Short story of my Vertex 2’s short life
Several months ago, I wanted to give a little speedup to my aging laptop. It also seemed a perfect time to give a first try to the SSDs everybody had been talking about. All in all, the OCZ Vertex 2 seemed like a good choice: the Vertex 3 was just out, so the Vertex 2 price was going down and making it almost affordable.

On that faithful day of 25th September 2011, I bought a Vertex 2 online, and installed it in my laptop. The change was so noticeable ! It was really a great buy… except that just 4 months later, when powering on my laptop, I found out that it was hanging at the hard drive detection BIOS step, only to time out after 30 seconds, blatantly stating that no hard drive was found. Nothing I could do would bring the hard drive back, even when trying in another computer. After some research online, I found out that the exactly same thing happened to a countless number of people around the globe.
My hard drive had just entered in the panic lock mode, a deadly and overly stupid non-documented feature of the included SandForce controller, which meant that all data stored on it was inevitably lost, and the disk itself was dead for good. Just like that. For no apparent reason.
So, I got it refunded to buy a replacement, an Intel 320 “PostVille refresh”
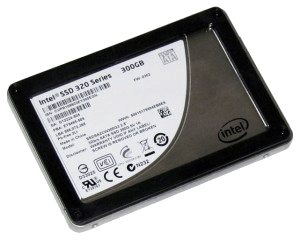
…which is still alive by today and works like a charm, and sweared I would never buy OCZ again.
Never forgive, never forget
It should have been my motto on this day, but it wasn’t. On September 2012, I decided to replace my old laptop by a full-featured PC. I bought an-OEM pre-built one, as it had all the pieces I wanted, and it was cheaper than if I had to buy all the pieces separately. It had an hybrid configuration for mass storage: a 1 Tb HDD, and an SSD. Unfortunately, it was an OCZ. Well, the PC was cheap enough and I had almost forgiven OCZ for their terrible Vertex 2 model. This one was an OCZ Petrol SSD, and it was not powered by a SandForce controller. So, I thought I was safe from the stupid panic mode.

Well, I was right… but unfortunately it was actually way worse than a panic lock, way more insidious, as I found out what it was doing only months after it started to destroy my data.
This is the nightmare of any sysadmin (or anybody that cares for his data): silent data corruption. It started with randomly crashing programs. The first one was Chromium: one day it would just start to crash every time I tried to launch it. I thought it had something to do with Flash or some other broken plugin, but didn’t even bother to look into it and just raised my shoulders and switched to Firefox. Then some time later Firefox started to crash too, so I switched to Midori, the XFCE browser, telling myself I would have to look into that later. Yes, I can be extremely lazy at times.
I eventually came to the conclusion that Flash had nothing to do with that when I started to get freezes and floods of unreadable sector messages in the kernel log. Hell, the drive was (again) just 4 months old! And all the SMART indicators as seen by smartctl were green! Bah, yet another cursed drive from OCZ! I used some liveusb install to use ddrescue and try to get as much data back as possible from the drive before it would suffer an eventual instant death, as I knew anything was possible with an OCZ drive.
I already used ddrescue and friends numerous times for mechanical hard drives (yes, I’m unlucky with hard drives), and it always worked pretty well. This was the first time I used it on an SSD however… well, It was a nightmare and took me three days.
Welcome to data rescue hell
I was getting read speeds of exactly 150 Kb/sec on very large areas of the drive, which was pretty frightening for an SSD. For the record, OCZ rates this drive at 350 Mb/sec sequential read speeds. Let me spare you the maths, this is 2390 times slower than the normal speed. But even, it would have been too easy: when OCZ wants to eat your data, it won’t let you get it back so easily. The main problem was not even the speed: once the drive tried to read a problematic sector, it would freeze the SATA bus for 2 whole minutes, then a kernel timeout fired and tried to reset the SATA bus to try to get it back in a working state. But the reset never worked and always timed out too, and that’s when the /dev/sda block device would disappear each and every time. Then ddrescue would happily continue try to read from the non-existent device, and conclude that none of the remaining data was readable.
I was about to patch ddrescue to handle this issue more correctly, but in the end I just used the option to tell it to stop after the first error. Because then, the SSD would have become unreachable from the OS anyway. I could do nothing to make it reappear in a scriptable way, not even triggering a SATA bus reset or rescan… the only thing that worked was to electrically unplug the drive and plug it back, then instruct the kernel to rescan the SATA bus for new devices. Pretty brutal, but only that or a reboot would work. It means I had to be there, in front of the computer, imitating a robot that puts and pulls a plug. Really annoying. Anyway, after three days of plugging/unplugging between rare successful reads at 150 Kb/sec, it finally recovered 100% of my data. Supposedly at least: that was strange because some sectors that were unreadable on some day ended being readable the day after.
The rescued SSD image passed the filesystem check almost successfully, so it was reassuring. After copying it to some other drive and booting from it, I still had the crashes from Chromium and Firefox however. So, I instructed rpm to verify the checksum of all the files from installed packages. It found a lot of mismatches, and Chromium/Firefox were sure among those. The solution was easy: reinstalling the concerned packages. Of course, it worked.
Silent corruption?
But what about my data ? Not the stuff in /usr or /var, the stuff in $HOME ? Why wouldn’t it be corrupted too ? How can you trust your backups when you have a drive that has been silently corrupting your data for months ? Well, you can’t.
As my backups are incremental and rsync-based (actually, rsnapshot-based), the decision to re-upload a modified file is taken by having a look at it’s size and modify date. If these are matching on both ends, then the file wasn’t modified, so no need to re-backup it. The problem with silent corruption, you see, is that, well, it’s silent. Which means, when some bytes are modified by a shitfaulty hard drive, the size or modification date won’t be. The different cases that could happen on a given file would be:
- File backed up cleanly before I switched to the faulty drive, later corrupted by it, but never modified by me or a program before I did the data recovery. Then, the copy on the backup would be safe.
- File backed up cleanly before I switched to the faulty drive, later corrupted by it, then modified by me or a program, hence re-backup’d. These legit modification vs corruption vs new incremental backup cycles being repeated several times, eventually. Here, by comparing two adjacent backups, there’s no way to tell which parts of the modifications are normal and which parts originates from the corruption.
- File created after I switched to the faulty drive, and maybe corrupted by it before the first backup, so no way to tell if the first or even any of its later backups are safe.
In short, it’s a pretty lame situation. The two last cases are more or less hopeless, except for files where the corruptions are obvious, like images for example. For the first case, there’s still hope to get the clean data back from the backups. But how to detect this case ? New generations of file systems like ZFS or Btrfs are supposed to mitigate that, by check-summing everything, from data to metadata. Hence silent corruptions can’t go undetected, and can even be fixed if you have sufficient replicas of your data, by a process called scrubbing. Anyway in my case it was classical ext4, so no luck.
Tentatively detect and fix silent corruption from incremental backups
I started rsync on my NAS (on which I have my backups) with the following configuration:
1
2
3
4
5
6
7
8
9
10
11
12
13
14
15
$ cat /etc/rsyncd.conf
[backup]
	comment = nas backup
	path = /raid1/hdda/rsnapshot-quasar/monthly.4/speed/home/speed/
	use chroot = yes
	lock file = /var/lock/rsyncd
	read only = yes
	list = yes
	uid = root
	gid = nogroup
	strict modes = yes
	ignore errors = no
	ignore nonreadable = yes
	transfer logging = no
	timeout = 600
I used the incremental backups from 4 months old, which I know are not corrupted because it was before I had the drive. This was to try to save the files and personal documents that I have on my hard drive since a long time and that don’t get modified a lot. The uid is set to root so that I’m sure that rsyncd can read all the backup files (that might have several different uids that only make sense on my original computer anyway).
1
# rsync --no-detach --daemon --verbose --config /etc/rsyncd.conf
Then, on the PC with the rescued drive image, I launched the following command so that rsync lists the files that it thinks are different between the backup source and the rescued data. This is, files that have different sizes and/or modification times. So those files were genuinely modified between 4 months ago and now. Maybe they were corrupted too in the process, but there’s no way to tell. That’s files from the first two cases in the list above.
1
$ rsync -va --dry-run rsync://nas/backup/ . | tee rsync_list_1.txt
After the first list is complete, populate a second list but with a crucial difference: if the size and modification dates match, rsync will no longer assume the files are the same, it’ll do a byte-per-byte comparison. This second list should contain all the files from the first list, plus the files that have been silently corrupted (where the byte-per-byte comparison will fail).
1
$ rsync -va --dry-run --checksum rsync://nas/backup/ . | tee rsync_list_2.txt
And then, running a simple diff shows that indeed a non-negligible number of my $HOME files are corrupted:
1
2
$ diff -u rsync_list_{1,2}.txt | grep ^+ | wc -l
728
A visual example of a diff between a backup and the current text file is self explanatory:
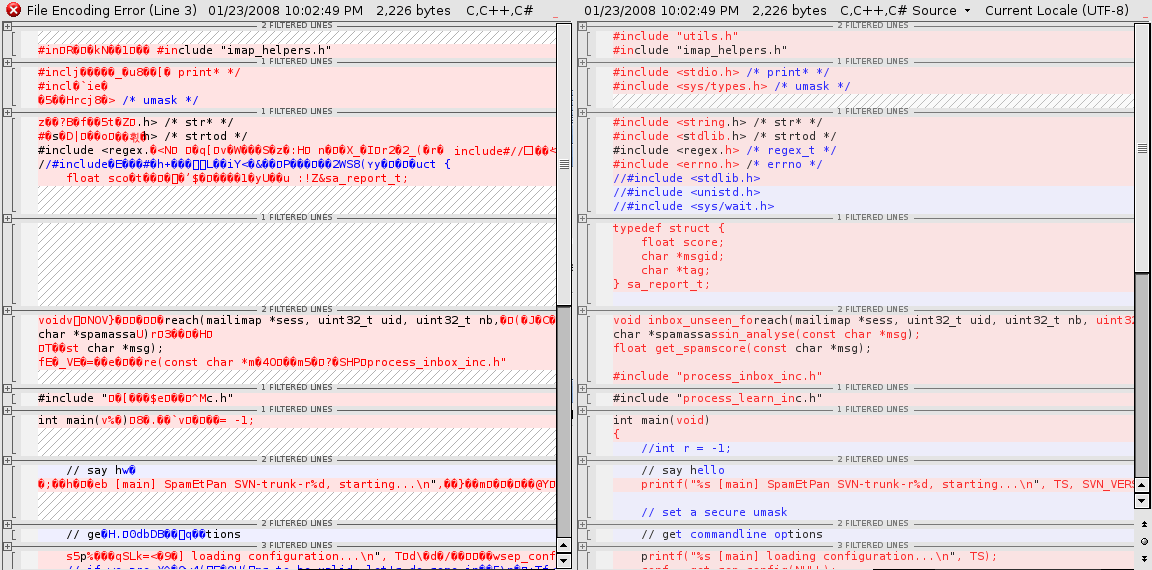
Thank you, OCZ. Before restoring those files from my backup, I wanted to measure how many bytes were corrupted by the drive.
1
2
3
4
$ perl -ne 'm{(.+)} or next; @out=qx{cmp -l "/home/speed/mnt/sshfs/raid1/hdda/rsnapshot-quasar/monthly.4/speed/home/speed/$1" "$1"}; $corrupted+=scalar(@out); print $corrupted."\n"' RSYNC.SILENT.CORRUPTION.LIST | tail -n1
60904419
$ perl -ne 'm{(.+)} or next; $total+=(stat($1))[7]; print $total."\n"' RSYNC.SILENT.CORRUPTION | tail -n1
1951053630
So, this wonderful drive silently corrupted roughly 58 MiB of data in my backuped files (the fucked up files have a total size of 1860 MiB). It has corrupted other files too (system ones, fixed by packages reinstall), and all the files I couldn’t detect because they had legitimate modifications in addition to the corruption modifications. Anyway, as I couldn’t measure that, let’s do a favor to OCZ and don’t even count those. This disk has a capacity of 128 Gb. It wasn’t even full at all, but let’s pretend it was, to do yet another favor to OCZ. Hence, we can see here that it corrupted roughly at least 1 bit each 2101 bits.
To compare with classical consumer-level hard drives (Seagate, Western Digital, …) you’ll see in their technical sheet that those are usually rated to corrupt one bit out of 10^14 bits read or written. This is 1 bit corrupted each 100 000 000 000 000 bits. From there, it’s pretty straightforward, and backed up by the facts I have, to come up to this conclusion:
an OCZ drive is roughly 47 596 382 675 times more likely to silently corrupt your data than any other drive.